

If you’re like most of us, as soon as the weather starts to warm up, and the mornings are bright and sunny, you start thinking about your garden, and what things you can do to have the most successful growing season ever in 2017! Soon, you’ll see little chutes begin to pop up, and before you know it, you’ll be eating fresh salads directly from your own garden every day.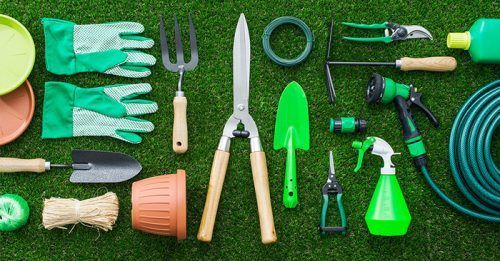
Before you start your garden, though, here are a few tips to help you prepare, grow, and maintain your garden the best way possible starting right now!
Choose plants that will give you the most yield at harvest time. A plant that is resistant to disease, or one that is tolerant of extreme weather, will deliver a higher yield.
1. Order early
Create useful rulers from your tool handles. Large handled tools such as shovels, rakes, and hoes can be used as measuring sticks. Lay your handles on the floor, and put measuring tape right next to them. Use a bright permanent marker and label the distances. Now you have easy access to a long ruler whenever you are gardening.
Cover fences and walls with lots of climbers. Climbing foliage is a great way to disguise unsightly features on your property, sometimes in the span of just one season. You don’t have to worry about removing trees between the climbing plants and the fence, because the trees don’t present obstacles to the climbers’ growth. Some people use climbers as a natural “ceiling” to arbors. Sometimes the plants will require being tied to supports, but some climbers will attach themselves naturally. There are many varieties you can choose from. Honeysuckle, climbing roses and jasmine are among the best.
A windy and rainy early spring day is the perfect time to get out the catalogues, and order your flower bulbs, and seeds. Every gardener has a few seed catalogues ready to offer inspiration and advice when picking just the right flowers and vegetables for your area. Keep in mind your sun/shade areas, your climate, and your soil when choosing bulbs and seeds.
Use proper soil for the best results. Depending on the types of plants you would like to grow, your garden’s soil might need to be amended with different substances to alter drainage, acidity and other charactheristics that make plants happy. You may also cultivate an artificial area comprised of just one type of soil.
2. Clean up
Make a landscaping plan before you dig your first hole. This way, you will remember the places you planted your seeds when they start sprouting. The plan will also help you keep track of your more diminutive plants and smaller groups that could otherwise become lost among a sea of larger plantings.
One natural method of weed removal is called “boiling“. A pot of boiling hot water can be one of the most safe weed destroyers. Just pour out the water on the weeds being careful to avoid any nearby plants. Boiling water damages the weed roots and will inhibit future growth.
Before you even begin planting, you’ll need to clean up and clear out those old beds and borders. Turn over the soil to prepare for new planting, and add in organic matter such as compost, seasoned manure, or old grass clippings. This will create the healthiest soil for your garden to grow.
Split up irises. If you split up clumps of them, you will eventually have more of this flower. Once the foliage has died off, lift out your bulbous irises. The bulbs will then split naturally in the palm of your hand and if they’re re-planted, they can flower next year. You should divide rhizomes using a knife. Get rid of the center and keep the new pieces you cut from the outside. Divide your pieces carefully; they should each have one good quality offshoot apiece. Replant right away.
3. Plan
Be sure your garden is fertilized. Manure can be effective, though you should use products which minimize pathogens. You have the ability to choose from quite a large array of fertilizer, however there is not a great difference between them. It is just crucial that you use something.
If you are going to grow peas, start them inside rather then planting them outdoors. Install your plants inside and wait for the seeds to germinate. The seedling may also be hardier, which means that they can better resist disease and attacks from pests. After the seedlings have grown strong indoors, it will be time for you to transplant them to outdoor beds.
It pays to rotate your planting areas when you are gardening vegetables. Grab a notebook and a pen, or use an online planner, to get an idea of where you’ll be planting your seeds to maximize the area you have to plant in. Take tips from seed catalogues regarding your growing period, and the zone you live in. Take into consideration how many hours of sunlight your garden will get on a daily basis. Good planning can make or break a successful vegetable garden.
During the hottest hours of each day, your vegetables become too soft, and even gentle harvesting will cause damage and bruising. When you remove the produce from the plant, use shears or a knife to cut them from the vine without twisting, as this can damage the plant.
4. Your greenhouse
Include your kids in growing an organic garden. You can provide a good learning experience that your children can appreciate the more they learn on how to grow healthy produce.
When growing indoor plants, the thermostat should be set between 65-75 degrees throughout the day. Plants require a warmer climate to grow. If you don’t like keeping your home that temperature in the winter, you may wish to consider getting a heat lamp, instead, to keep your organic plants the correct temperature.
If you’re a lucky gardener with a greenhouse, get out there and wash it down with a good disinfectant. Remember to wash down benches, trays, and pots, too, and keep it open over a couple of days to make sure it dries thoroughly.
It is easy to quickly prepare your perennial garden ground. Use a spade to dig into the turf, turn the turf over, then spread the area with approximately three inches of wood chips. Allow a few weeks to pass by before you dig down into the applied soil.
5. Start early
Have plastic bags on hand so that you may cover your muddy gardening shoes. This lets you be able to return to the garden without interrupting your work.
It is common knowledge that grounds from brewed coffee are good for soil. They contain nitrogenous nutrients which are essential to plant growth. Usually, nitrogen is limited with a plant, but using coffee grounds, diluted urea, or compost can make your plants grow faster and taller.
Begin starting seeds inside that need a longer growing season. You can start this in February or March, if you have a heat mat and lights. There are many flowers and vegetables that benefit from being started indoors, so do some research. Just about anything can be used as starter planters – even ice cube trays, pint milk cartons cut in half, yogurt cups, and/or toilet paper rolls cut in half and stood on end. The point is – start growing those seedlings!
Increase your property value with landscaping. Landscaping is a cheap way to really increase the value of your property. In fact, you can boost your home’s value by a fifth with the right landscaping, and in the right market. Seek out plants and shrubbery that require limited maintenance and will adapt well to the natural climate that you live in.
6. Pesky pests
Include both green and dry plant refuse in your compost. Examples of green plant material are spent flowers, fruit and vegetable waste, grass clippings, weeds, and leaves. Dried material includes straw, shredded paper, and cardboard. You should not use things like meat scraps, charcoal, blighted plants or the manure of meat-eating animals in your compost.
Create raised beds with stone, brick or untreated wood. If you choose to use wood, see to it that it’s untreated and that it can resist rotting. Optimal wood choices that fit these criteria are locust, cypress, and cedar. In a veggie garden, don’t use treated wood since its chemicals can leech into the food crops and soil. If you have placed treated wood in your garden, line it with a coat of plastic.
Inspect your gardens carefully for any pests that have decided to over-winter there. The crowns of perennials are where many slugs, aphids, and snails take shelter over the winter. Clean out last year’s pots and if you see pests when you clean, consider purchasing parasitic nematodes as a protectant that won’t hurt your garden, only the pests.
Garlic is an excellent choice to grow organically. The best time to plant garlic is either early spring or in the fall. Plant garlic in moist soil with good drainage. Space the clove about four inches apart, with the pointy end up and about one or two inches deep. Green garlic shoots can be cut as they grow, and used in place of chives or scallions. Each bulb can be harvested when the top has begun to brown. Dry the bulbs in the sun in order to harden their skin. Store the dried bulbs loosely or in bunches in a dark, cool area.
7. Move shrubs
Be particular when selecting the plants you will include in the organic garden. Different plants require different sorts of environments. An example would be seen in the many different varieties of roses, as some will grow well in your garden, where other varieties may not. So you want to make sure you find ones that are suited for your organic environment.
Mulch your garden with no less than 3″ of organic bedding material. This is not only beneficial for the earth, but it also saves you water and money on the water bill. You may be surprised to see how good it can look!
Got a shrub or shrubs that you’d like to move? Now’s the time, while it’s still in its dormant stage. You’ll want to do this on a non-windy day so that the roots don’t dry out. Dig up as much of the root ball as possible, and this will mean digging a wide circle around the shrub. It’ll be able to establish itself much quicker if you do this. Don’t place them deeper than they were in their previous soil level, and when you’re done replanting them, give them a good drenching.
One should build a border with a fence around their garden before they even start planting their garden. Being able to keep pests and animals away minimize the factors that could cause destruction in your garden.
8. Fix
In a tiny garden, try planting a small fruit tree. While many city lots especially have small gardens, it’s so easy to find some room for these tiny little fruit trees. This type of fruit-bearing tree will begin to show a full sized fruit in about four years, give or take a year. Dormant trees should be placed in the ground early in the spring season and should get good levels of water until they establish themselves.
Humidity might be needed by some houseplants. It is possible to obtain the proper humid environment when you cluster plants together in a single pot. Another way to get more humidity for your houseplants is to mist them up to two times a day using water.
As soon as the weather warms enough, get outside and repair garden boxes, raised beds, fences, trellises, and gates. These tasks aren’t what you’ll be wanting to do when planting time comes, so get them out of the way earlier rather than later, so you can enjoy your summer gardening. Enlist the help of high school students if you need an inexpensive way to get some of the bigger repairs completed without breaking your gardening bank.
Do your research on vegetable gardens and develop a written plan! Make a detailed list of everything that you would like to plant, and include a clear drawing of your available growing space. You can then use that drawing to plan out where each item should be planted. Consider variables like width at maturity, moisture, required sunlight and plant height.
9. Garden tools
Clean them up with a disinfectant to stop the spread of disease from bacteria and fungus. Give them all a good sharpening, or take them to a local hardware store to do the job. You’ll enjoy your gardening more when you have clean, working tools to use.
10. Compost
If you don’t already have a compost area – create one! You can either buy or make a bin, and you’ll have an awesome place for garden and organic food waste. Add in grass clippings, paper, and wood. As the compost breaks down, turn it each month, and soon it’ll be a boon to your garden.
By prepping your garden sites now, and doing some advanced planning, you’ll be ready to go when it comes time to get those seeds (or seedlings) in the ground.